|
| Please click on the pictures for larger images |
Yin and Yang, contrast - it is as vital in approach as it is in design. We've talked about taking a class - controlled, anticipated outcome. Now we'll talk about the contrast: the "fly by the seat of your pants, breathlessly, fearlessly, giddy with fear and expectation of what lies over the next rise" kind of contrast - going into the unknown, risking, experimenting. This is where intriguing discoveries are made, most often disguised as so-called mistakes. Judging an outcome as a mistake reveals that one has already set the parameters for the outcome of the effort. There is an expected result, and, barring achievement of that result, we judge the outcome a failure, a mistake.
Here I present my latest Eureka! Pretty? Not by any definition! Fabulous? Absolutely!
 |
| light shining through behind to show translucency of top |
Here's how it came about. It was time for me to
experiment. I wanted to work with the ivory and add the feel of glass and get really rustic - the primitive ceramic/pottery/faience type rustic. My studio does not even remotely resemble those pictured in glossy magazines. I usually have to search around for a clear space that will hold my backside, so fat chance of finding a clear space to park a sheet of clay! (The Arctic Fox often suggests that he hang a large sheet of melamine/plywood from a pulley system bolted into the ceiling above my work surface. That way, when I run out of space, I can just winch a clean surface down onto the existing chaos and start fresh). He thinks he's witty!!!

I try to find a used piece of wax paper to place the sheet of bone/ivory clay down onto. I don't want to use deli wrap (silicon-too hard to find, or dry wax-leaches plasticizer) or plain paper (leaches also). I spot a piece and plunk the clay down. I make up the translucent, adding dry pigment, white acrylic paint, embossing powders-just a trace (white, black and pale turquoise) onto half the clay, roll out thinly, tear in half, place the relatively clean half on top, roll out thinly, then roll up roughly, leaving creases and overlapping edge, cut into sections about 1/4 the height I want the finished bead to be.


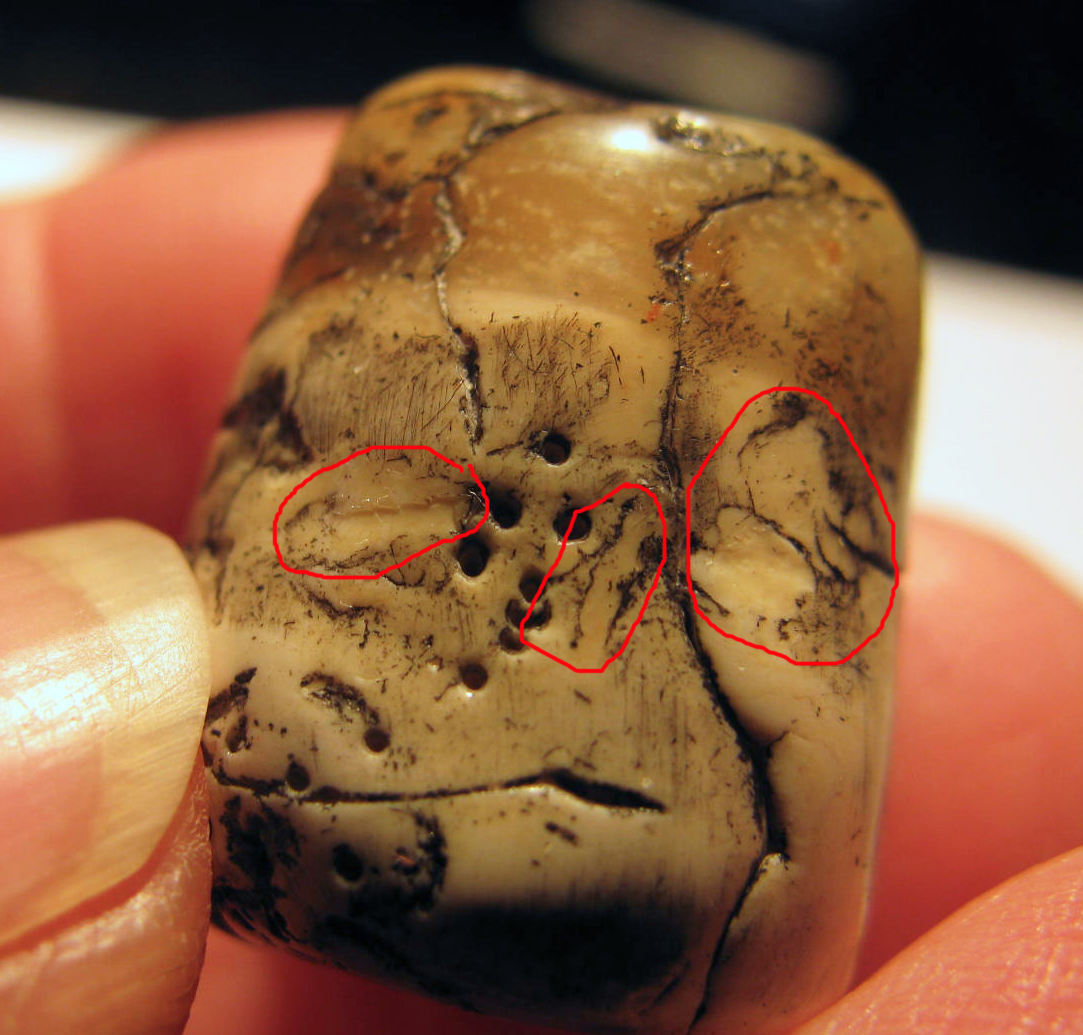
I then pick up the bone/ivory sheet and notice something has stuck to my clay. It is thin, transparent, and brittle. I realize it is dried white glue. I use wax paper under items that I glue, and now I have dried glue on my clay. No problem. I know that PVA glue is very compatible with polymer clay (I bake it into the cores of thin bangles braced with paper). I'll just leave it. It will probably just disappear. I roll up the bone/ivory, shape it into the bead, affix the translucent on top, blend the two, distress with my favorite texturizing tools (another post another day) and bake. I decide this time to antique with black acrylic paint because I don't want oil paint staining into the surface of this bone/ivory (maybe my right brain knew something I didn't!).
 |
| without the red outlines |

I wipe off the excess paint with a damp rag and notice distinct spots that have taken no paint at all, smooth in the midst of texture, outlined with strong detail! I love the look! It has to be the dried glue. It prevented the texture from affecting that area and being dried and brittle when attached, it "broke" when manipulated into shape. (I will play around with this and see where it takes me) Knowing that I've used acrylic paint for the antiquing, and that acrylic paint buffs to a beautiful high gloss, I use the buffer to make it gleam. It really fascinates me! I ask The Arctic Fox why I find this so much more intriguing and delightful than all the "pretty" pieces I make periodically. He responds, "Because you love the process!" He's absolutely right! Don't tell him - he's already too male!
Sometimes it's good to push through your "mistakes"!
Some more images below: