Showing posts with label bracelet. Show all posts

Saturday, April 11, 2015

Wine Country Tessellated Necklace and Bracelet


The Wine Country necklace is finished. It proved a challenge since I wanted the kaleidoscope beads to not rotate and therefore made two channels for stringing. The round beads only have one hole, so the challenge was to find appropriate accent beads that would gradually channel into the one hole beads. A close-up view is below:
click on images to see larger versions
The clasp is also handmade, from coated brass wire:

The co-ordinating bracelet will be auctioned off in the ARCAC fund-raiser tonight and is pictured below:


Please feel free to leave comments or questions below. 

Wednesday, April 8, 2015

Perfection = Predictable = Boring! The Artist's Mark

It feels great to be back in the saddle!
pattern assembled from scraps cut from the kaleidoscope cane

I've touched on this before. We create art because we have something to say, something that can best be said visually, not verbally. The viewer of our art completes the creative act by responding to the art. One thing that can derail this interaction is boredom (there are other things which I'll talk about another time).

For many, anything predictable is quickly glossed over. The brain likes to be engaged, and when it can predict the outcome or the continuing pattern or the next step it yawns and moves on.

Why is it, then, that many artists struggle so hard to make their work perfect?!

In any work of art it is the unpredictable colour, the unfinished line, the hint of something partially erased, that intrigues and makes the viewer stay a little longer, savoring incongruity.

In polymer clay, perfection can be achieved and repeated ad nauseum by a well-built machine. Why would we want to turn out art that looks like it was made by a machine?

The mark of the artist is unique to that artist and distinguishes a piece as hand-crafted, unique, special. That's why I've named my new studio The Artist's Mark. It's to remind me to remember to let my individuality be an integral part of my work, and to leave it visible so no one can mistake it for 1 of 100,000 produced in a factory.

I'll be demonstrating Kaleidoscope Caning at an art event at ARCAC this Saturday evening. There is very little exposure to polymer clay out here on the east coast of Canada, and I hope to stir up some interest. I've developed a palette for this cane that I call Wine Country. It is rich and elegant with a deep metallic colour that I call Madeira Wine colour, a soft, pale neutralized green called Celadon, a deep woodsy dark green called Deep Woods Moss, a soft white called Ivory, Black and a soft yellow called Sunshine.

If you would like the formulas for the all the colors in the Wine Country palette, leave a comment at the end of this post and I'll make it available at no charge, either via email or in the blog if there are enough requests.

Here are the beads that will be assembled into a necklace and bracelet to auction off at the event on Saturday.

extruded cane slices on co-ordinated spacer beads

beads ready for backing, then second curing and finishing

canes ready to tessellate

Hollow focal bead for the necklace, slightly irregular, definitely hand-crafted!
I'll post a picture of the necklace and bracelet when assembled.

Saturday, October 5, 2013

Gamla : The Saga Continues

Back home, house is listed for sale, you could definitely say my trip to the beach was eventful! We're moving - to the ocean. I guess you can only keep a Norwegian away from salt water, seaweed, wind, sand and smoked mackerel for so long before she starts to shrivel and become nasty!!! So, the excellent adventure continues. It probably explains the sea-related sagas that have taken up room and board in my head.

The Troll from the Tre Bukkene Bruse Book Bracelet 


thatch-roofed house

the complete bracelet with the oldest Billy Goat Gruff

The bridge under which the troll lives

the book


More characters have appeared and I'll introduce them as they develop.

Gamla (The Olden One): More feared than the Krakken, more terrifying than Surt, the Fire Giant, Gamla sits in her rocking chair, wizened and shrunken. A mountain of pillows add nothing to her diminutive size and the heavy blankets do little to keep the cold from chilling her bones. No one is sure of just how deep her knowledge of the olden ways goes, or of how far reaching her inner sight. None call her kin, yet none dare to send her away.

Gamla stretched out a gnarled hand, gripping my arm with surprising strength. Her skin like thin parchment stretched over a bony frame with veins dancing beneath the surface like swollen worms pulsing with life. Her years stretched thin: her body a frail 4 stone, her will - iron! Fierce determination gleamed in her eye. She had lost none of her passion. "You must tell the story, Anne-Brit!" she rasped. "It cannot end with me, for then there will be no escaping the fjaerning! " Gamla coughed and wiped some spittle from her lip, "Someone must keep watching" she hissed. "Call The Gatherer." Closing her eyes she seemed to shrink into the blankets, dismissing Anne-Brit with a deep sigh.

Liv tugged urgently at her mother's skirt. Anne-Brit was white as the lace on her blouse. "Mama, what was she talking about?" she asked, fearful as much for the look on her mother's face as for the words she had just heard. "I don't know, child...... I don't know." Her mother's voice was low. "Is she a troll?" Liv's words drew a quick glance from her mother. "Don't be rude, child." she admonished. Liv couldn't stop, "But she looks just like a troll with that one big eye glaring at me like that," she muttered.

to be continued.......

Friday, September 7, 2012

Creative Process: Birth of the Flamenco Collection - Mining a Vein

As mentioned before, the seeds of future work often lie in what you've just done. Having finished the Urban Urchin necklace, patterns and shapes keep my mind ablaze.

The beginning of the new Flamenco Collection, born from this little element in the Urban Urchin necklace.
This red ruffle is like the skirt of a beautiful flamenco dancer set against the black of her hair and her lace shawl - you can almost feel the movement. Problems have arisen that push forward, uninvited, demanding to be pushed further. The strength of polymer, properly supported - how thin and delicate can it go?


This prototype is the beginning of the new line. I'll be exploring this concept over the next while. You're welcome to eavesdrop on my thoughts and add some of your own.

Wednesday, July 18, 2012

Designing Jewelry in Polymer Clay

Polymer clay jewelry can be incredibly strong. Weaknesses usually come about because of flaws in the design of the piece. It's always good to make a prototype and wear it under all kinds of circumstances. If there is a weakness, you'll soon know. However, a little thought beforehand can save you from wasted effort. Areas of attachment often need extra support, as do areas with very different thicknesses next to each other. Two examples follow:
Tsukubai:


The Burlesque Blend is here used to create a beautiful Japanese-styled pendant. These are two left-over pieces from the sides of the "Meandering Path" pendant (tomorrow) The pearl is suspended between the two legs by a brass wire making for a tactile, kinetic piece (the pearl spins) This little attachment area helps stabilize the two legs of the pendant. Where the Burlesque Blend legs attach to the upper black branch, there is a need for support. The black branch is composed of two pieces of polymer clay stacked together with flattened wire paddles in between that extend down and into the Burlesque Blend legs. This is a very strong yet relatively thin piece.

Orbital Bling:


Support is needed at the three corners of this bracelet. This bangle is reversible and only 1/4" thick and the corners are inset on both sides, making the corners only 1/8" thick. Wire would be a pain to work with in this piece, so the strength here is supplied by paper.

Having been a paper-maker for over 40 years (from scratch, pounding different plants from my garden and surrounding fields) I've come to be amazed at the strength of paper made from the right kind of fiber. For example, thin copy-weight paper made from only processed crocosmia leaves cannot be torn by hand! In this particular case I chose to use manila paper (shape cut from a manila file folder) Both sides of the manila paper shape were covered with white glue and allowed to dry. The clay adheres to this PVA glue when it is baked. Scrap clay is applied to the top and bottom of the paper shape, then the surface pieces inlayed with Burlesque Blend were added. The result is a very strong bangle.

Thursday, January 19, 2012

Polymer Clay Tutorials, Tips, Tricks and Techniques

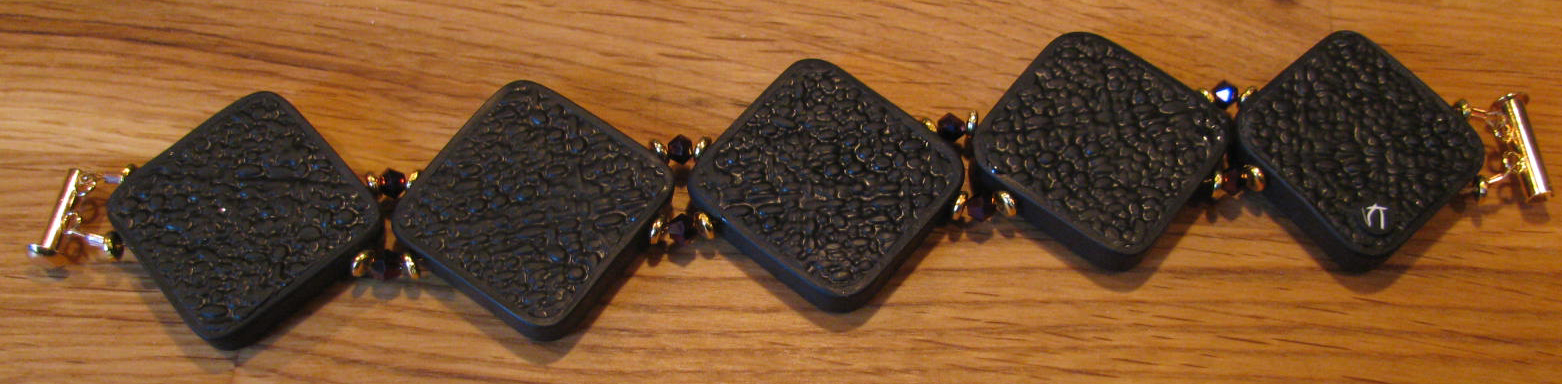
Here is the finished bracelet. Looks great with brass clasp and heishi beads. Also beautiful 4mm bicone crystals accent the piece. 


 The back has a nice finish. My signature cane is in place.


Here is a close-up and a picture of the bracelet on my arm. 


Saturday, January 14, 2012

The Beginning of "Polymer Clay My Way"

It's time to launch into the new value-added part of Claymagination - "Polymer Clay My Way". I thought of calling it "Your PC Guru" but that sounded a bit pretentious. In this segment I present solutions to problems I've encountered, techniques I've discovered along the way, techniques pioneered by other polymer clay artists that I've tweaked to make my own, or even ways in which I've found to highlight some wonderful techniques pioneered by other artists. I'll do my best to explain the reasons behind design decisions I've made and also present you with some design challenges that I find stimulating and fun.

This first episode pushes the technique taught by Lisa in last year's Claymagination 2011 retreat. One of the issues that I struggle with is settings that are not "worthy" of unique, hand-crafted art. We would all set our art into settings made from gold or platinum, if price were no issue, but in today's economy, art suffers badly, and the artist suffers along with it. We need to find a way to present our art so the work is not viewed as "cheap" yet the price we need to charge does not make our art inaccessible to most.

Silver plated settings look good, but only for a certain amount of time. Eventually the plating wears off, and our art gets set aside. Precious metal is wonderful, but pricey, and to help bring down the cost, artists (such as Lisa) are now making their own sterling silver settings. I really think that is the way to go since it dignifies and elevates the work to an art, but it does increase the price of the piece.

To keep the price down, if you have time available, consider using polymer settings. With attention to detail and finishing, your work becomes an even more hand-crafted work of art and it's permanence is guaranteed. It won't have to be sidelined because the plating wore off the setting!

Here is Lisa's technique set into polymer clay bezels.

As you can see, the lip of the bezel is raised slightly to accommodate the subsequent resin pour. One benefit of doing this is that there is no danger of the decorated surface "floating" when the resin is poured because it sticks to the polymer clay backing.


Now it's time to sand, with 400 only since I want the shine to be only on the resin surface.


You must make sure the polymer clay bezel is firmly attached to the square as the resin will find any little crack to seep out of it if can! You can see the upper corner on the back in the image above, the resin started to ooze out.


To see any of these pictures enlarged, just click on them.

I'll post a picture of the assembled bracelet when done. 
If you have any questions, post them to this blog post and I'll do my best to answer them.