.... unless they are cured! But here's the reality of clay - it can start to cure at 90 degrees Fahrenheit (Kato starts to cure at 115 degrees F)! So those of you living in warm climates - beware!
I've seen a fair bit on blogs and pinterest lately about warming up old clay. The suggestions have been to put the clay in a ziplock bag and drop it into a bowl of hot water, or to put it on a heating pad. These ideas are only of use if you carefully monitor the temperatures involved, otherwise you may be shortening the shelf-life of your clay.

Polymer clay doesn't really dry out as there is no water in there to evaporate. The chemicals that comprise polymer clay may separate a bit with time, but mixing these properly yields a product good as new.
The best way to store clay is in a cool, dark place. Light, even artificial light, affects clay because UV radiation breaks down polymer over time.
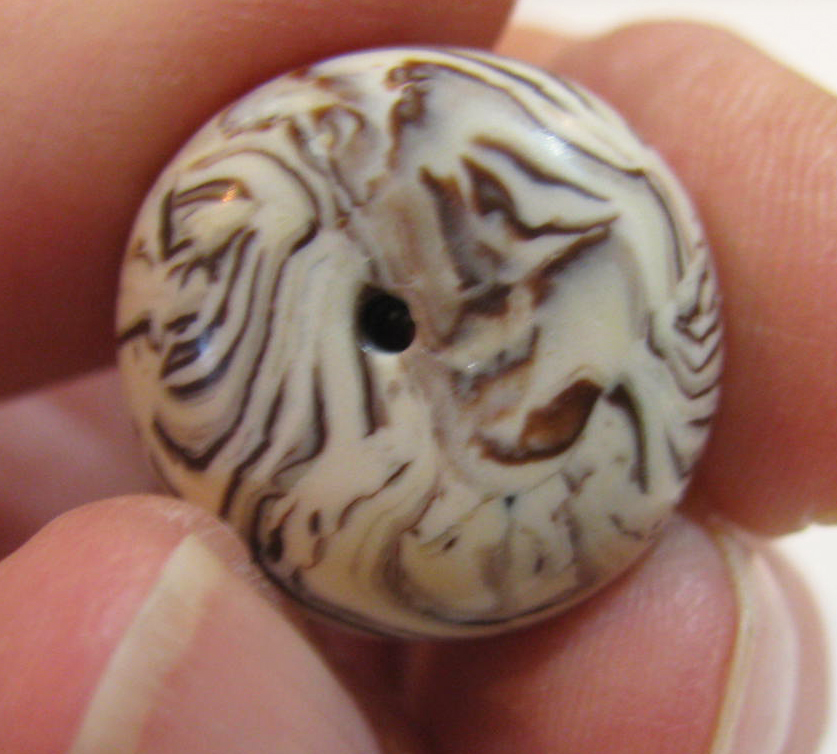
Warming clay up against your body is a good idea because, although your internal temperature is around 98.6 F, your surface skin temperature is usually around 10 degrees lower. This bead was just made with clay that is 18 years old!

I've decided to use up all my old clay canes and other experiments. With the pendants I'm currently making,
like the Wind Whisperer, I want some rustic, ancient, woody/bone/resin type beads, and I saw this cane buried under a pile of old experiments. I had made my first mokume gane and didn't understand the role translucent played in highlighting metal leaf in this process so the result wasn't totally satisfactory since much of my silver leaf disappeared, hidden by the opaque bone layer. I then took all the scraps and stacked them and rolled a log, sliced it lengthwise into long, 1/4 rounds, flipped and reassembled them to experiment with the Natasha bead technique. the result was this cane.
I only have 4 inches left, and, although I'm taking thin slices and covering scrap clay to make the beads, I'm a post-war baby and start to panic when I think I'm running out of something I find useful, so the following is to show you my process for reproducing this look (since I didn't keep lab books for my clay experiments when I first started out!)
I used Premo white, beige, ecru and burnt umber. I used silver leaf (aluminum, not sterling)
I had mixed up an ivory using ecru, white and burnt umber but I've since changed to cad yellow, white and burnt umber so I'm using the new formula for ivory. I then mixed up some of this ivory with more burnt umber and beige to make the mid-brown, more translucent piece shown here.
The sheets were rolled out on the thickest setting and cut the same size and shape and the silver leaf adhered to the medium brown piece.
These were stacked from dark to light. You'll notice that they are not perfect rectangles. I prefer to do mokume gane this way since I pinch and stretch and compress the stack till it takes the shape of a rectangle. In doing this I am distorting the layers slightly and I find this enhances the variation of the colour patterns when I slice thin sheets off.
Flatten this sandwich out till it fits through the thickest setting on the pasta machine. Roll through. Cut in three, stack, roll through again, cut in three, stack, press onto a tile or glass surface so it adheres well and then even up the edges a bit.

Spray the surface with water as a release agent and use various implements to distort the surface. When using straws or metal tubes to cut small circles, I spray water up into the tube to help keep the clay from sticking and getting pulled out of the stack. I use a rocking/circular motion as I gently press down and also as I slowly remove the texturizing tool. This helps keep the clay in the stack.
Use a paper towel to remove as much water as you can, flipping the tile over to drain any water out to the surface so you can absorb it. You don't want water trapped in the clay.
Press the stack together and roll your acrylic rod to compress the stack a bit to adhere the cut pieces so they don't fall completely apart when you slice.
For slicing I use the Thomas Scientific blade(shown in the post "Demo Part 1: The Ossifibulous Bracelet"), a new one. I clean the blade with a baby wipe between each slice. If you have difficulty controlling the blade, raise the stack up onto a scrap stack BEFORE you begin making the patterns in the stack (so you don't lose the tight grip the clay has on the surface). Take your time slicing. It is easier to feel the angle of the blade and make minor adjustments if you are going slowly. The movement that works best for me is a slicing movement slightly on the diagonal as I am drawing the blade towards me. That way you are cutting, rather than pushing the clay.
Check out both sides of the slice to see which one you like the best. I place my slices on wax paper so I can lift the paper afterwards, look at the patterns from underneath and decide which slices I want to flip over.
This tiny stack and slow slicing yielded 8 full and 2 3/4size usable slices - that's great!

This was a nice side benefit of reconstructing the old scrap cane, but now it's time to stack the scrap left over, including any solid pieces of ivory. I stack it all, stretch, adding thinned out ivory to separate the darker layers, then roll this stack into a log. Cut the log lengthwise, then cut each long half in half lengthwise again so you have four longish quarter rounds. Flip these over and assemble as per a Natasha bead (if you don't know or can't find instructions for the Natasha technique, leave a comment and I'll show it on the blog)

The original bead made 18 years ago from the original mokume gane scrap (I like to keep one bead for reference and future development)

The new bead.