Showing posts with label resin. Show all posts

Wednesday, December 5, 2012

Studio Tip #4 - Working With Resin

The Sludge Jar
(click on images for larger photos)

No, I have not branched out into alchemy, although I do find some of the ancient premises fascinating. The creative scientist in me is always driven to defy accepted limitations. This, my friends, is my "Indiana Jones" moment, my crystal skull, if you will. Working with mixed media, resin is a regular tool. One problem with resin is that it sticks - sometimes where you don't want it to. We know it does not stick to polyethylene (white kitchen garbage bags) which is why my studio worktable is covered with garbage bags. You can drop left-over resin onto the plastic and, two days later, peel them right off to use elsewhere. But I digress.


When a resinned surface needs to be sanded down to remove bubbles or schmutz, it's almost impossible to sand and buff the surface to achieve that initial, brilliant shine. It's much easier to brush on a new coat of resin which seals all the scratches and marks and gives a brilliant shine again. That's what I had to do with the pendant below, and you can see it looks like new.
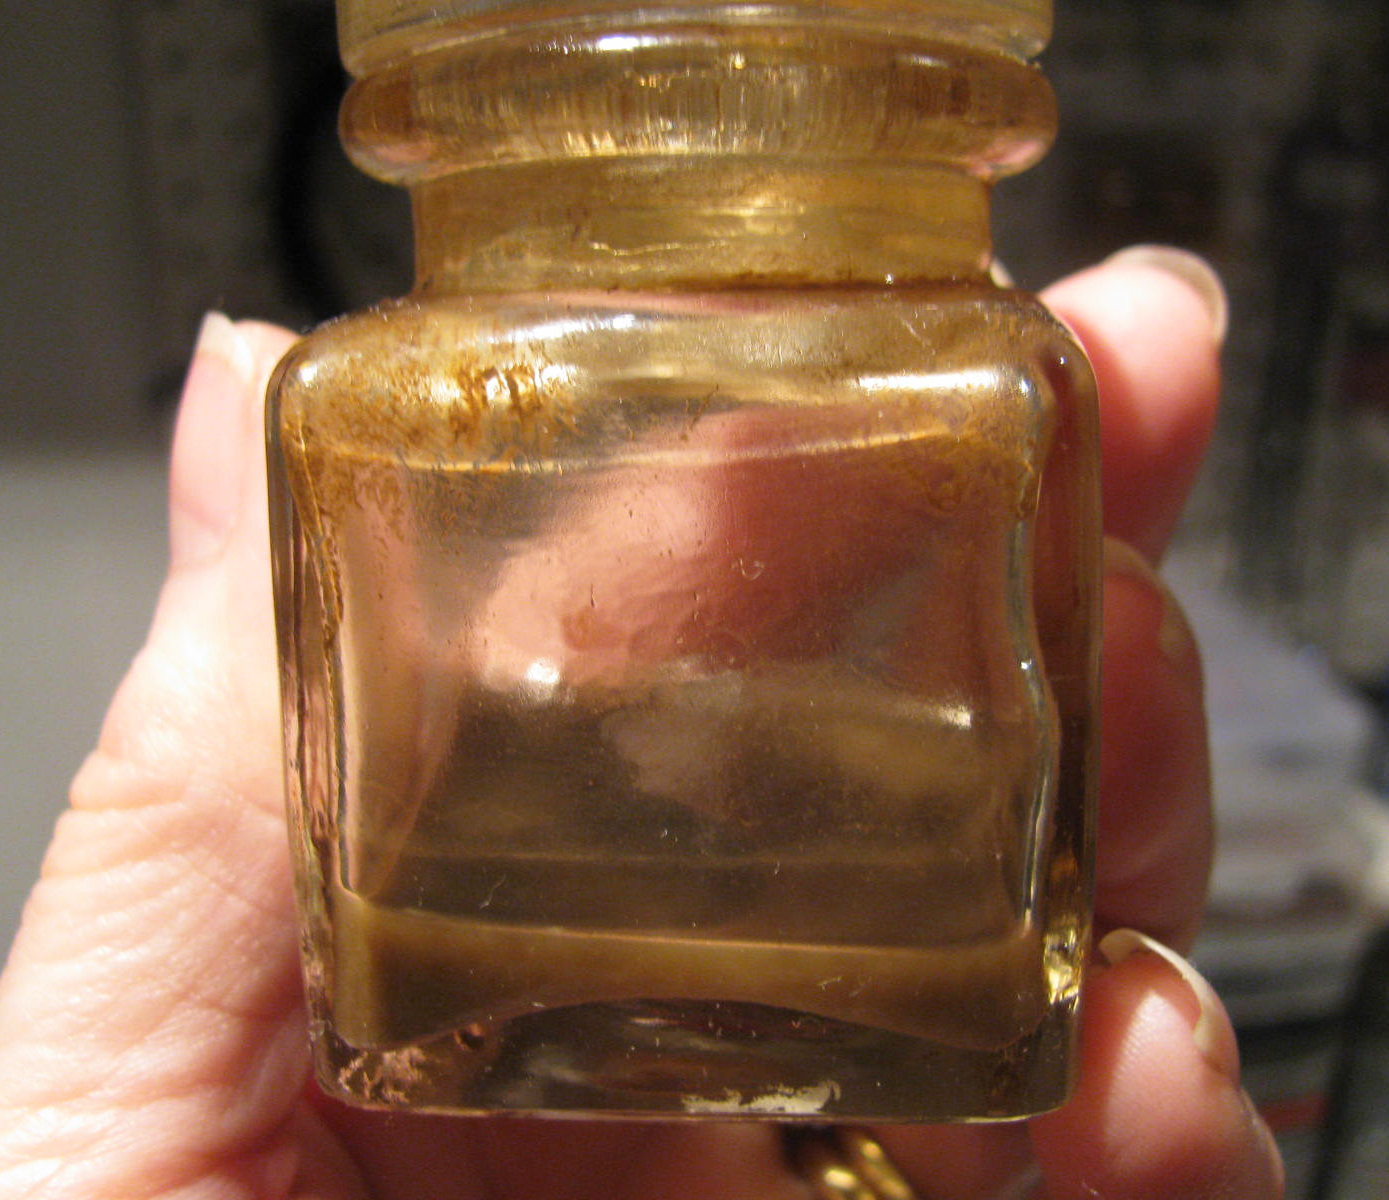
In order to brush on the liquid resin, you need to use a brush, and every professional I've spoken to says the brush is toast afterwards - toss it in the garbage. I love to brush resin onto stamped tissue paper, but the idea of using a sponge (soaks up a ton of resin and has to be thrown out afterwards) or a brush that would have to be sacrificed is not acceptable. (I'll talk about the pros of using resin to coat tissue paper over using liquid clay another time). So, time to experiment. I've used several products in my art-life that I have talked about in my workshops, getting a kiss on the cheek from one student's husband because he had been able to recondition all his old acrylic paint-encrusted brushes to supple new softness - but I digress again. I hauled out "The Sludge Jar", the jar I use to clean my paint brushes after antiquing clay with oil paint. It contains:

I dipped the still wet resin-coated paint brush into the sludge jar, schlumped it around a couple of seconds, wiped it off on a paper towel, rubbing gently in between bristles, and voila!


Some pics of resin work in progress for the weekend show.


Thursday, January 19, 2012

Polymer Clay Tutorials, Tips, Tricks and Techniques

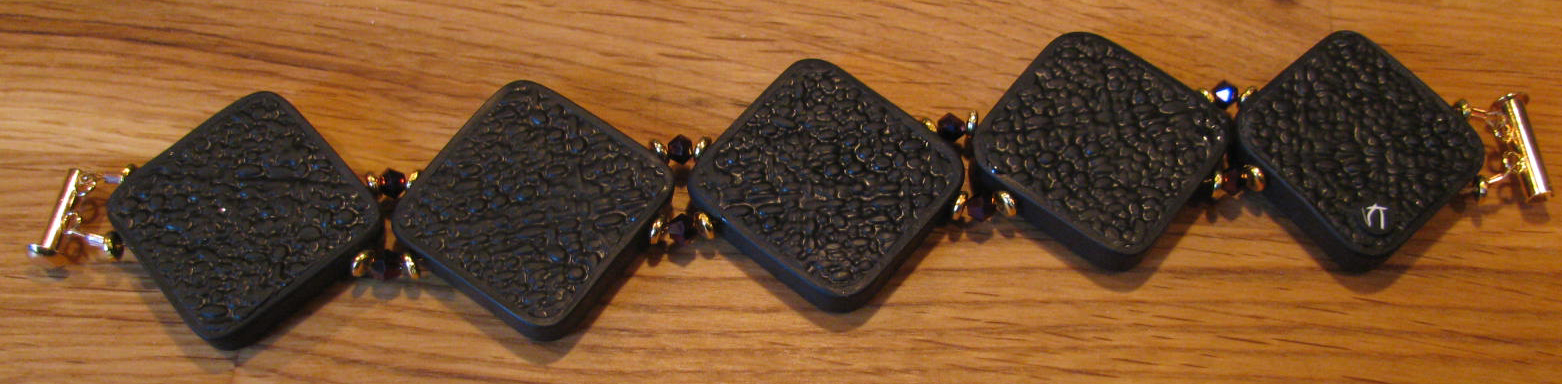
Here is the finished bracelet. Looks great with brass clasp and heishi beads. Also beautiful 4mm bicone crystals accent the piece. 


 The back has a nice finish. My signature cane is in place.


Here is a close-up and a picture of the bracelet on my arm. 


Saturday, January 14, 2012

The Beginning of "Polymer Clay My Way"

It's time to launch into the new value-added part of Claymagination - "Polymer Clay My Way". I thought of calling it "Your PC Guru" but that sounded a bit pretentious. In this segment I present solutions to problems I've encountered, techniques I've discovered along the way, techniques pioneered by other polymer clay artists that I've tweaked to make my own, or even ways in which I've found to highlight some wonderful techniques pioneered by other artists. I'll do my best to explain the reasons behind design decisions I've made and also present you with some design challenges that I find stimulating and fun.

This first episode pushes the technique taught by Lisa in last year's Claymagination 2011 retreat. One of the issues that I struggle with is settings that are not "worthy" of unique, hand-crafted art. We would all set our art into settings made from gold or platinum, if price were no issue, but in today's economy, art suffers badly, and the artist suffers along with it. We need to find a way to present our art so the work is not viewed as "cheap" yet the price we need to charge does not make our art inaccessible to most.

Silver plated settings look good, but only for a certain amount of time. Eventually the plating wears off, and our art gets set aside. Precious metal is wonderful, but pricey, and to help bring down the cost, artists (such as Lisa) are now making their own sterling silver settings. I really think that is the way to go since it dignifies and elevates the work to an art, but it does increase the price of the piece.

To keep the price down, if you have time available, consider using polymer settings. With attention to detail and finishing, your work becomes an even more hand-crafted work of art and it's permanence is guaranteed. It won't have to be sidelined because the plating wore off the setting!

Here is Lisa's technique set into polymer clay bezels.

As you can see, the lip of the bezel is raised slightly to accommodate the subsequent resin pour. One benefit of doing this is that there is no danger of the decorated surface "floating" when the resin is poured because it sticks to the polymer clay backing.


Now it's time to sand, with 400 only since I want the shine to be only on the resin surface.


You must make sure the polymer clay bezel is firmly attached to the square as the resin will find any little crack to seep out of it if can! You can see the upper corner on the back in the image above, the resin started to ooze out.


To see any of these pictures enlarged, just click on them.

I'll post a picture of the assembled bracelet when done. 
If you have any questions, post them to this blog post and I'll do my best to answer them.