Saturday, January 26, 2013

Old Canes Never Die...

.... unless they are cured! But here's the reality of clay - it can start to cure at 90 degrees Fahrenheit (Kato starts to cure at 115 degrees F)! So those of you living in warm climates - beware!


I've seen a fair bit on blogs and pinterest lately about warming up old clay. The suggestions have been to put the clay in a ziplock bag and drop it into a bowl of hot water, or to put it on a heating pad. These ideas are only of use if you carefully monitor the temperatures involved, otherwise you may be shortening the shelf-life of your clay.

Polymer clay doesn't really dry out as there is no water in there to evaporate. The chemicals that comprise polymer clay may separate a bit with time, but mixing these properly yields a product good as new.

The best way to store clay is in a cool, dark place. Light, even artificial light, affects clay because UV radiation breaks down polymer over time.

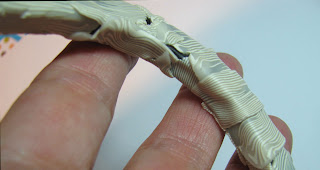
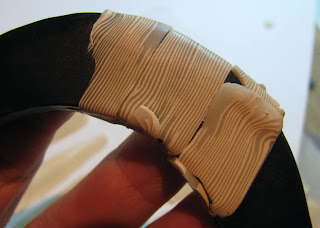
Warming clay up against your body is a good idea because, although your internal temperature is around 98.6 F, your surface skin temperature is usually around 10 degrees lower. This bead was just made with clay that is 18 years old!


I've decided to use up all my old clay canes and other experiments. With the pendants I'm currently making,
like the Wind Whisperer, I want some rustic, ancient, woody/bone/resin type beads, and I saw this cane buried under a pile of old experiments. I had made my first mokume gane and didn't understand the role translucent played in highlighting metal leaf in this process so the result wasn't totally satisfactory since much of my silver leaf disappeared, hidden by the opaque bone layer. I then took all the scraps and stacked them and rolled a log, sliced it lengthwise into long, 1/4 rounds, flipped and reassembled them to experiment with the Natasha bead technique. the result was this cane.


I only have 4 inches left, and, although I'm taking thin slices and covering scrap clay to make the beads, I'm a post-war baby and start to panic when I think I'm running out of something I find useful, so the following is to show you my process for reproducing this look (since I didn't keep lab books for my clay experiments when I first started out!)

I used Premo white, beige, ecru and burnt umber. I used silver leaf (aluminum, not sterling)
I had mixed up an ivory using ecru, white and burnt umber but I've since changed to cad yellow, white and burnt umber so I'm using the new formula for ivory. I then mixed up some of this ivory with more burnt umber and beige to make the mid-brown, more translucent piece shown here.

The sheets were rolled out on the thickest setting and cut the same size and shape and the silver leaf adhered to the medium brown piece.

These were stacked from dark to light. You'll notice that they are not perfect rectangles. I prefer to do mokume gane this way since I pinch and stretch and compress the stack till it takes the shape of a rectangle. In doing this I am distorting the layers slightly and I find this enhances the variation of the colour patterns when I slice thin sheets off.

Flatten this sandwich out till it fits through the thickest setting on the pasta machine. Roll through. Cut in three, stack, roll through again, cut in three, stack, press onto a tile or glass surface so it adheres well and then even up the edges a bit.


 Spray the surface with water as a release agent and use various implements to distort the surface. When using straws  or metal tubes to cut small circles, I spray water up into the tube to help keep the clay from sticking and getting pulled out of the stack. I use a rocking/circular motion as I gently press down and also as I slowly remove the texturizing tool. This helps keep the clay in the stack.
Use a paper towel to remove as much water as you can, flipping the tile over to drain any water out to the surface so you can absorb it. You don't want water trapped in the clay.

Press the stack together and roll your acrylic rod to compress the stack a bit to adhere the cut pieces so they don't fall completely apart when you slice.

For slicing I use the Thomas Scientific blade(shown in the post "Demo Part 1: The Ossifibulous Bracelet"), a new one. I clean the blade with a baby wipe between each slice. If you have difficulty controlling the blade, raise the stack up onto a scrap stack BEFORE you begin making the patterns in the stack (so you don't lose the tight grip the clay has on the surface). Take your time slicing. It is easier to feel the angle of the blade and make minor adjustments if you are going slowly. The movement that works best for me is a slicing movement slightly on the diagonal as I am drawing the blade towards me. That way you are cutting, rather than pushing the clay.

Check out both sides of the slice to see which one you like the best. I place my slices on wax paper so I can lift the paper afterwards, look at the patterns from underneath and decide which slices I want to flip over.

This tiny stack and slow slicing yielded 8 full and 2 3/4size usable slices - that's great!


This was a nice side benefit of reconstructing the old scrap cane, but now it's time to stack the scrap left over, including any solid pieces of ivory. I stack it all, stretch, adding thinned out ivory to separate the darker layers, then roll this stack into a log. Cut the log lengthwise, then cut each long half in half lengthwise again so you have four longish quarter rounds. Flip these over and assemble as per a Natasha bead (if you don't know or can't find instructions for the Natasha technique, leave a comment and I'll show it on the blog)


The original bead made 18 years ago from the original mokume gane scrap (I like to keep one bead for reference and future development)


The new bead.

Friday, January 18, 2013

Demo Part 2 (of 2): The Ossifibulous Bracelet

Please click on photos for larger images
I'll have to rename my studio the "Turner Trench" because of all the ancient relics that have been unearthed here - faux fossilized bone, fossilized husband (aka The Arctic Fox) - just kidding, honey! I've just been told that the above line is classic passive/aggressive behaviour - no! Really?!!


Let's pick up where we left off.
When you have covered the entire bracelet with the faux bone it should look something like this (I couldn't get the auto focus to work until I placed a strong contrast shape in the field!)


There will be variation in thickness of the slices, overlapping areas and bare areas - in other words, it will be very irregular.


At this point I use my handy-dandy WABL wand (designed by me, named by me after me, purely for posterity's sake; no ego involved whatsoever, I swear!) You could use a large knitting needle. I like this thin acrylic wand because I can see through it. Anyway, I use this to smooth out all the irregularities by rolling them out to the outer edge, following the direction of the striations on the faux bone slices. I also use my fingers to smooth areas difficult to reach with the wand and to distort the striations a bit.

This helps to create randomness in the outer edge because areas with thick or overlapping slices will bulge out slightly on the outer edge, creating irregularity which, if you choose, you can remove, or keep as part of the design shape.


All smoothed out.


It's time to create the focal edge. The original bracelet has a dark grey, almost leather-look edge and it goes very will with silver accessories.


I wanted this one to have a more mechanical, steampunkish remnant that related to gold, or warm tones.


To find more detailed directions for making this, please go to the Scrap Clay Process post earlier in the blog. You can find this easily by going to the small "search" window on the left, lower down, of the main page and typing in "scrap clay process". Any of my posts that involve this process will come up in a list and you can choose the one you want - in this case I believe it is Sept. 29, 2012 - Scrap Clay Process. Ok, ok, I know, I am Sheldon incarnate (with a touch of Penny thrown in to humanize me!)


Tear off (or cut - your choice) a piece and apply over the edge. Add some detailing (in this case I want to simulate riveted plates of metal)


Distress the faux bone veneer if desired as described in the first faux fossilized bone video. This picks up the paint used to antique and adds a lot of interest to the piece. You will see this at the end.

It's time to add the finishing touches - bling!


You will need to experiment with the amount of black clay in the little ball that forms the bezel around the flat-backed crystal. You want enough that it bulges up around the sides and holds the crystal in place, but not so much that it overwhelms the crystal. I make all the balls at the same time so the sizes will be the same for all crystals of a particular size. It's frustrating when you get the perfect crystal setting and don't know how big a ball you used to get it! Flatten the ball slightly before you set it in place.


Place the flat-back crystal (I use Swarovski's - they are really beautiful!) on the flattened ball. Use the flattened back end of a paint brush or rubber-tipped clay tool to gently, evenly push the crystal down till the sides come up and encase the crystal. If you want you can use a rubber-tipped clay tool to gently push the edges in so they hold the crystal firmly. If you are worried that it won't hold, gently pry the crystal off and glue down with a tiny bit of cyanoacrylate glue.


Here is the bracelet ready for the oven. I place it on a double layer of polyester batting and cover with foil. Bake about 1 hour.


Here it is after sanding to 1000, antiquing with oil paint (half black, half burnt umber) and buffing on the Foredom.


Both sides of the new one. You can see the difference in the faux fossilized bone in the two bracelets. The one with the charcoal attachment has a finer, more even bone striation, whereas the one with the bronzey metal attachment has a more irregular striation with much more translucent, yielding more dark areas peeking through. 

Thursday, January 17, 2013

Ocean Waves Jewelry Collaboration


Please click on pictures for larger image

You will have noted that I don’t have ads on my blog. That is by design. But sometimes I find an entity that shares my obsession for doing it right.

Ocean Waves is such a company. They are small by design with a passion for producing very high quality polarized sunglasses. I got to know them when I lived in Florida and they got to know of my work. For the past 23 years, they are the only sunglasses I have worn because, in my opinion, they are the best available- at any price.
What does all this have to do with jewelry, you ask? Well, a while back they contacted me and asked if I would consult on a jewelry project and while the end product is very different from my personal work I thought it would be interesting. It was!


I consulted on colours and frame designs and the result is now available as the Ocean Waves Diva Collection. Swarovski Crystals are used to create a high fashion look of elegance and matching earrings and necklace are available.


One of the benefits I received was the ability to offer you a special deal on ANY pair of Ocean Waves sunglasses you might buy (not just the Divas). So if you want to protect your eyes and look like a Diva, go to www.oceanwaves.com and check them out. I’ve included a link on the left.

  They make models for the whole family and if you use my promotional code- SFREE- you will get free basic shipping.


I rarely recommend products but Ocean Waves has the best warranty in the business and I like them because they spend their money on product development- not advertising (that they get by word of mouth!). If you decide to buy a pair I know you’ll be more than satisfied.


So here’s the studio tip: this project had nothing to do with polymer clay- that’s why I wanted to do it. Sometimes as artists we get stuck in a closet of our own making. Some of us even carpet our ruts (to quote Mary Stewart) to make them nice and comfortable. We need to be constantly stretching ourselves and getting new inspiration.


 Yesterday I was at the Montreal Museum of fine art looking at hundreds of millions of dollars in post impression art. I am absolutely sure that at some point, the inspiration from that visit, along with my Ocean Waves project, will show up in my work.

P.S. Their website is undergoing major reconstruction so please be patient with them.

Ocean Waves Sunglasses - DIVA Collection


Monday, January 14, 2013

Demo Part 1: The Ossifibulous Bracelet

In following along with my process for creating this bangle you may decide that it is too work intensive and that it would be easier to just cut out a black circle, cover it with faux bone slices and be done with it. My goal is to make a piece of art that looks like it could be the real thing and that would be unique. A second bangle would appear related, but would not be able to duplicate this one exactly. I also want these to be high quality, sturdy and solid, even though they are relatively thin, so this is an opportunity to show you how I reinforce the strength of thin bracelets. I also must admit that I love the process. If you ever get the chance, read "Mastery" by George Leonard. To master something you have to fall in love with the doing; in other words, the journey is the joy, the destination being  merely the beginning of the next journey.

Randomness is difficult to achieve. Our culture defines perfection as something flawless, and rewards us accordingly. However, as I've said before, perfection doesn't interest me, so I work hard to create flawed, uneven, irregular, intriguing beauty. It's not easy - sit down with a bowl of bead soup and try to string a totally random necklace. After a few minutes, you'll be looking for shape or size or colour to balance or break up a pattern that is emerging randomly, thus forcing a deliberate pattern. The secret is to limit time. If you don't think you have the time to complete it you'll just do it and not think about it. Or do it while you're engaged in something else, something left brain, like conversation. That helps also. I mention this to explain some of my decisions in the process; they keep me from being a perfectionist.

The Process:
re-inforcement template
Draw out your bracelet on paper. Measure and draw the wrist opening, leaving a little bit of room for wrapping faux bone slices around the inside edge. Within that shape, draw the paper reinforcement slightly inside the outer edge and slightly inside the inner, wrist edge. Trace that reinforcement shape and cut it out. Use it as a pattern for drawing two reinforcement shapes onto heavier paper (I use manila file folders). Cut these two out but leave the wrist hole intact until after the next step.

wrist template


Draw the actual wrist hole (don't have it perfectly tight at this point because you still need a bit of room inside to wrap the faux bone around) within the inner circle and draw two registration marks across all three circles. This will help you line up your reinforcement template to see where you will cut out the wrist hole. You'll see what I do with this later on. Cut out the reinforcement template, leaving the inner circle with the thin strip around it. Cut off that thin strip and discard. Label the front of one wrist hole template (you only need one of these) and the two reinforcement templates.

Run the registration marks around to the other side of both reinforcement pieces (and on the wrist hole piece) so the marks are on both sides.  Lay one reinforcement piece on wax paper and brush on white glue. Let dry. Lift and flip over and glue the other side. White glue is usually PVA (polyvinyl acetate) which is closely related to polymer clay which contains a basis of PVC (polyvinyl chloride) resin and a liquid plasticizer (making it a plastisol), so they work well together. The glue bonds to the clay during baking. Just what you always wanted to know, right? ;-)

While the glue is drying, use the second reinforcement paper form to cut out the scrap clay, rolled out on #4 on a #1 (thickest) to #7 (thinnest) pasta machine. Position the tip of the blade at approx. a 45 degree angle so the edge is beveled, tapering towards the outer edge. I put the clay on a sheet of dry wax deli paper so I can easily rotate it as I cut. Important:  Flip the paper form over and cut out a second one, mirroring the first. Do not cut out the inner wrist holes in either one. This is one area where randomness comes in. Using a ready-made cutter would not be my choice.

I work with scrap clay at this stage in part because I like to use up the scrap clay, but also because, should I make a big cutting mistake, I can just ball the scrap
up and start over.


When the glue has dried, place the glued paper support shape into position on one of the cut scrap clay shapes. Make sure to put it in the proper orientation (that's why it's good to draw it freehand and slightly irregular. You'll notice my shape bulges out more on one side and is flat in one area - helps to align things as I go)


I now check to make sure the two halves are fairly even in shape. Spritz the back of one with water (so the second one won't stick to it) and line up the back of the second shape against it. Trim with scissors to even up if necessary.

If you had to trim, bevel that area to 45 degrees again.

Dry off any water before proceeding.


 Place both scrap clay shapes onto a sheet of black clay rolled out on #5 (thinner). Use the existing beveled edge to cut the black in an extended bevel.

 Close-up of the edge.

 Flip both shapes grey side down onto a sheet of dry wax deli paper. Gently push the edge down all around, curving the black outside edges of both halves.

Ouside edge curved.


As you smooth down the outer edge, check for any air bubbles and pierce them now. I use a #15 quilting needle which leaves a very small hole relative to the holes left by my X-acto knife tip or a needle tool (see picture to the right). Smooth lightly over the holes with your finger to close them up a bit.

Studio Tip #5: These needles are quite brittle and break easily. They are also difficult to pick up. Put a little thread through the eye, wrap the eye end in scrap clay and bake. Now it's easier to pick up and use. It's still brittle and needs protection (these things aren't cheap!) So I wad up some cotton fluff and stuff enough down a plastic syringe type vial that the needle is held high enough up the tube for me to grab and is protected for travel or whatever.

#15 quilting needle on left, acupuncture needle on right
Place the glued paper support back into place on the grey scrap clay on one half of the bracelet. place the corresponding wrist cut-out, with the thin strip removed into place, lining up the registration marks.

 Cut all the way through along the edge of the wrist template for about an inch at each registration mark, cutting the specific registration mark as well.


One of the two registration marks cut through to the outside. (You only need to do this on the one half)


Flip the wrist template over and place it on the outside of that half to check the registration marks are lined up. This is how you will know where to cut the circle for the wrist hole.

Place the second half on top, aligning edges, and gently press together.

 
Press the edges together all around and smooth out any seams.

Place the bracelet down so the registration marks show through. Put the wrist hole template in place, aligned with the registration marks.

Cut along the edge of the wrist hole template. I make several passes (around 6 to 7), going a little deeper each time. If you try to cut all the way through on the first pass you are more likely to distort this cut and distortion here is not a good thing. Remember there is a paper form inside and the difference between the embedded edge and the wrist edge is only as wide as that thin strip you cut and discarded, so you need to be fairly precise here. Remove the cut-out.

 It's time to slice our faux bone. I use a Thomas Scientific tissue blade for this (see the smaller, notched blade on the left, beneath the usually blade). I find this to be the best for thin slices.

Make a plethora of slices - ok, make a bunch! They can vary in thickness and don't dump any that are irregular. They work great in areas where you need to patch, as you'll see.


Start wrapping slices around the bracelet. I try to keep the slices going into the wrist hole thin or tear them there and stretch to bring them together. You don't want too much thickness there. Otherwise, I tend to line up the striations across the bracelet so it looks like it was cut from one piece of bone. that's a matter of preference and you could certainly wrap yours any way you choose. In lining up the striations, however, as the bracelet curves, you have excess faux bone angling down, so I tear these because I prefer a rough edge which I'll smooth out later. It gives me more random texture.


You will want to flip and rotate your slices so you get a random pattern in the faux bone. Otherwise it will become a very strong repetitive, unnatural pattern in the overall bracelet.


Continue to add faux bone slices until the entire bracelet is covered, front and back. You may choose to leave some small black areas open.  Part 2 to come.